My family means the world to me, and so do my friends! I think being celebrated just for who you are, and what you mean to someone, is a wonderful feeling! I love making cake for these special people. For 2 of my girlfriends, this key lime cake was the request. I decided to create an amazing, unique decoration on the outside of the cake. I used Tricia Yearwood’s family recipe for Key lime cake. https://www.recipe-diaries.com/2013/02/25/trisha-yearwoods-key-lime-cake/.
I love the look of a fondant cake – with it’s smooth finish. However, I’m not a fan of the texture or taste when eating fondant. So I’m kind of on a mission to get my buttercream just as smooth, with the look of fondant, but with the amazing flavor and creamy texture of buttercream. I think this came out pretty good for my first try!
Think you can’t do this?? Think again! I am not a professional pastry chef – I just have a lot of home grown experience. I have taught myself everything I know about cake decorating, and experience, trial and error, and practice are the best teachers. I always say – just get in the kitchen and do it! You might amaze yourself!
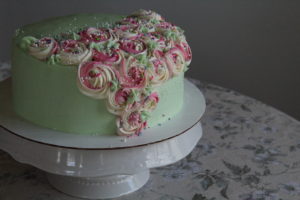
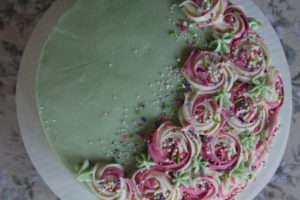
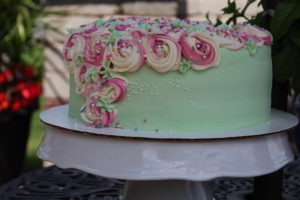
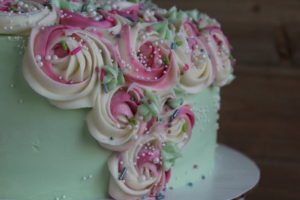
I chose a nice “lime green” color for the frosting. I also wanted to incorporate roses into this design, since they are beautiful in real life, or on a cake! I swirled the roses using my favorite 1M Wilton tip – and used a combination of pink and white buttercream. I covered only part of the cake with these little beauties, then added some pops of the lime green. I sprinkled the roses with a complimentary assortment of sprinkles, and edible pink glitter. Superb!
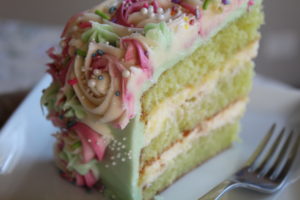
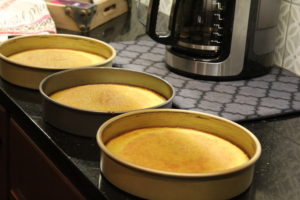
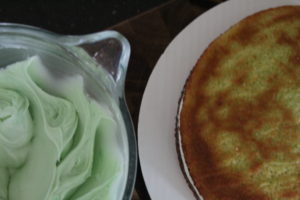
I started with the cake. I baked 3 layers of Tricia’s key lime cake. I made 1 slight change, and switched 1/2 cup of the oil, for 1/2 c of buttermilk. I think a cake with more than 1 c of oil, tends to become a little “greasy”, so for me, this solves that issue. Go to https://www.recipe-diaries.com/2013/02/25/trisha-yearwoods-key-lime-cake/. Cool the layers completely.
I made my key lime whipped cream filling next. Whip 2 1/2 c heavy cream and 7 Tbsp of granulated sugar, until stiff peaks form. Set aside. Combine 16 oz mascarpone cheese, and 2/3 c key lime curd, and stir to combine. Add the lime/cheese mixture to the whipped cream, and whip only until just combined, and smooth. Spread 1/2 of the whipped cream over 1 layer of cake, top with a 2nd layer, and spread the other 1/2 of the whipped cream. Top with the final layer. Smooth the edges using a rubber spatula. Refrigerate.

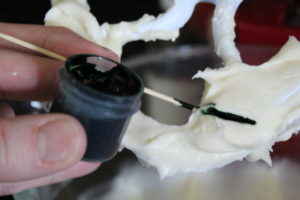
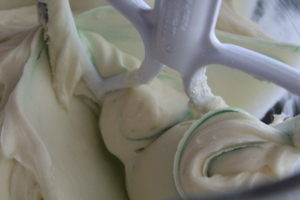
Make the frosting next. I used my go-to cream cheese buttercream frosting recipe (see prior post). I colored it a nice lime green, using a TINY bit of green gel food coloring. When you are going for a pastel color to your frosting, you only need a very small amount of color, so add this slowly using a toothpick. You can always add more, so blend the mixture, and check the color. This color came out perfectly.

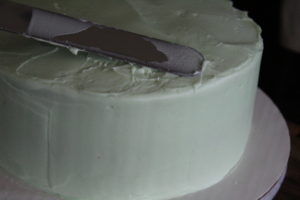
Begin frosting the cake, using an offset spatula, starting with the sides. Use a thin, “crumb coat” first, then go back and frost with a second layer to fully cover the cake. Smooth it the best you can, using the spatula. Then refrigerate the cake, for about 10 min. This will “set” the frosting.

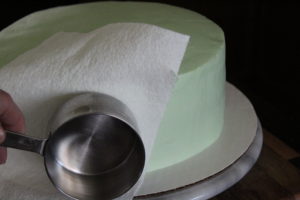
Then go back over the entire cake, using either a paper towel with no design to it, or a piece of parchment paper, and the bottom of a 1 cup measuring cup. Gently, smooth the frosting by moving the cup over the paper, in a slightly circular motion. Move the paper as you move around and over, the cake, to smooth it completely. (if the paper seems to be sticking to the frosting, refrigerate for another few min.) Refrigerate the cake when complete.

Make another batch of cream cheese buttercream frosting. I chose white, and pink. Split your frosting, and color as desired. I placed my pink frosting into a piping bag, with a 1M tip. Then using a long toothpick, I added a small line of the gel coloring right over the frosting. Fill the rest of the bag with the white frosting using your offset spatula, trying not to disturb the pink frosting until the bag is full.
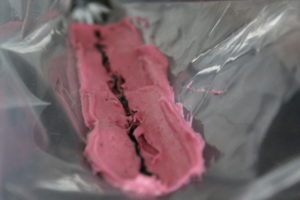

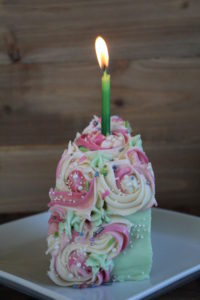
Then pipe in swirls to create the roses, starting from the center of each rose. Decorate as you like, then top with sprinkles and edible glitter. You really can’t go wrong here.
See how pretty this cake came out??