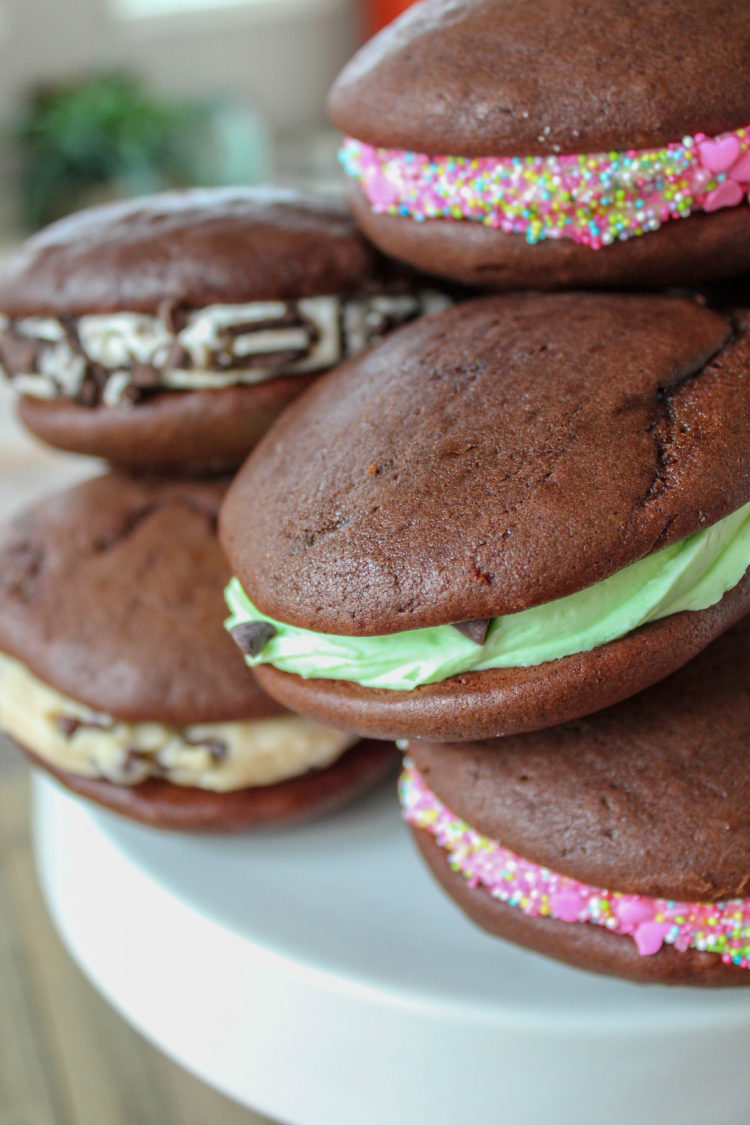
How fun are these! When I was growing up, my Mom would occasionally make a version of the “Devil Dog”. It tasted very much like the Drake’s hot dog-shaped chocolate cake, with a creamy white filling in the middle (a common addition to our lunch bag)!! Leave it to my Mom, to find a recipe to make them herself!
Her version used shortening as the fat in both the chocolate cakes, and the filling. I’m not a fan of this in most modern day baking – it does add moisture, however there is no flavor to it (not to mention the health implications!), and it usually makes a “denser” cake than butter.
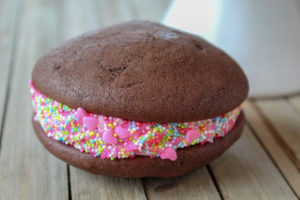
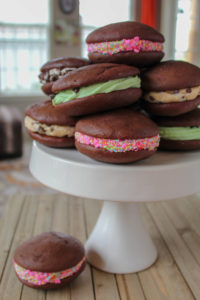
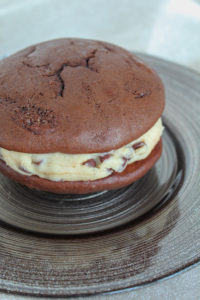
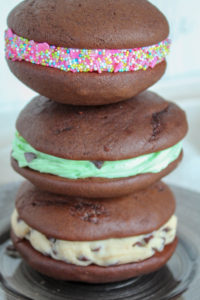
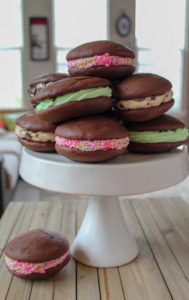
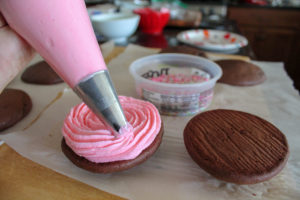
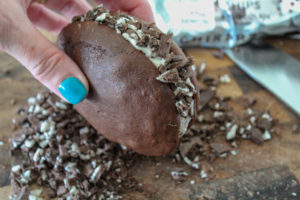
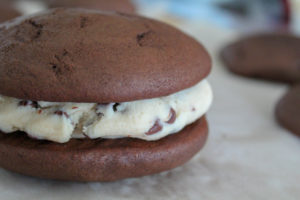
So I used a more traditional whoopie pie recipe for these. The cake is moist and fluffy, and made perfectly round whoopie pie discs. I used an assortment of fillings, but the possibilites are endless – cookies and cream, birthday cake with sprinkles, chocolate chip cheesecake, mint chocolate chip, and peanutbutter creamcheese. (Other yummy flavors are german chocolate, salted caramel pecan, and raspberry. There is a flavor combination for everyone!
Chocolate whoopie pie recipe:
Makes 15
Preheat oven to 350 degrees.
Line 2 cookie sheets with parchment paper.
4 c all-purpose flour
1 c cocoa powder
2 tsp baking soda
1 tsp salt
2 c light brown sugar, packed
2 sticks unsalted butter, room temp.
2 large eggs, room temp
2 tsp vanilla
2 c buttermilk
1/2 tsp instant espresso powder
In a large bowl, combine flour, cocoa powder, baking soda, and salt. Mix with a whisk, and set aside.

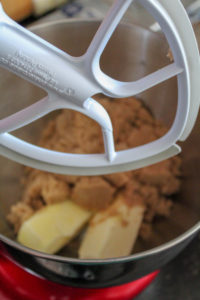
In a stand mixing bowl, using a paddle attachment, add brown sugar and butter, beat until light and fluffy. Add eggs, and blend. Add vanilla, and blend. Scrape sides of the bowl, and mix to combine.
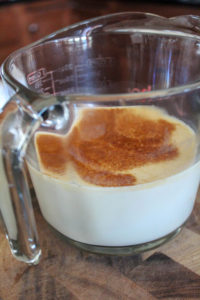
Combine buttermilk and espresso powder.
With the mixer on low, add about 1/3 of the flour mixture. Alternate this with the milk mixture. Repeat, until fully incorporated. Scrape bowl and blend again.

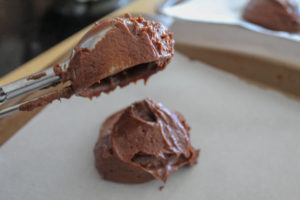
Using a large icecream scoop, slightly overfilled, place round dollups of batter onto parchment lined pans. Space about 2″ apart, with no more than 6 per pan. Bake for 8 min, then rotate oven shelves, and bake for another 5 min. Pull the parchment and the cakes onto the counter to cool (to stop the baking process on the hot pan). Continue to bake the rest of the cakes.

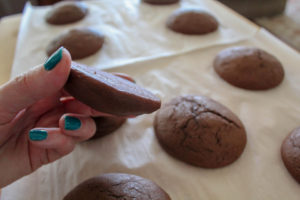
When completely cool, pipe your favorite flavor filling or frosting onto 1 flat side of a cake, then cover with the flat side of a second cake. Select 2 similar size/shaped cakes. Press together gently. You can roll the edges through sprinkles or other garnishes.


Refrigerate covered, for up to 1 week. They will freeze well-wrapped for up to 1 month.